

Checklist
1. Create a New Checklist
The Checklists section allows users to create a new checklist by providing a name, description, and relevant tags. After creating the checklist, it can be further configured with sections and checklist items.
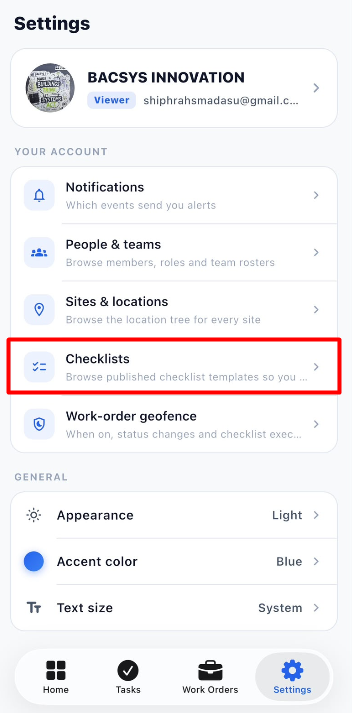
Steps
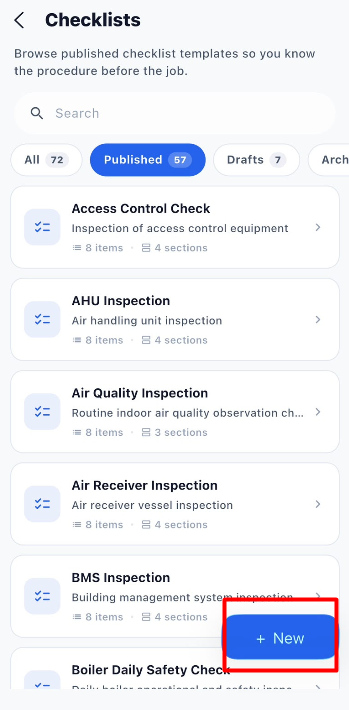
-
Open Settings.
-
Select Checklists.
-
Click + New.
-
The New checklist pop-up is displayed.
-
Enter the checklist Name.
-
Enter a Description explaining the purpose of the checklist.
-
Select the required Tags.
-
Click Create checklist.
-
The checklist is created successfully.
-
The newly created checklist can then be configured with sections and items using the web builder.
New Checklist Fields
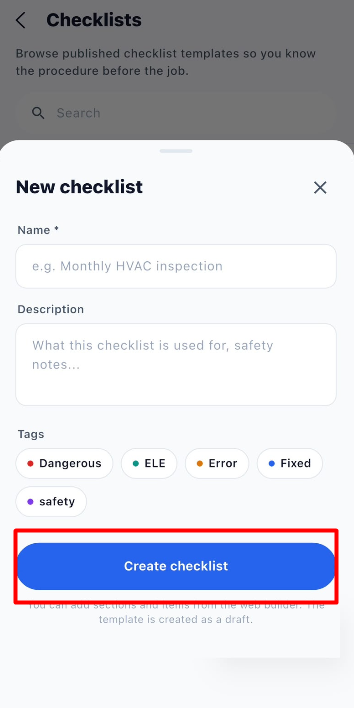
| Field / Option | Description |
|---|---|
| Name* | Enter the name of the checklist. This field is required. |
| Description | Enter a description explaining what the checklist is used for. |
| Tags | Select the relevant tags for the checklist. |
| Create checklist | Creates the new checklist. |
| Close (X) | Closes the New checklist pop-up without creating the checklist. |
2. Manage a Checklist
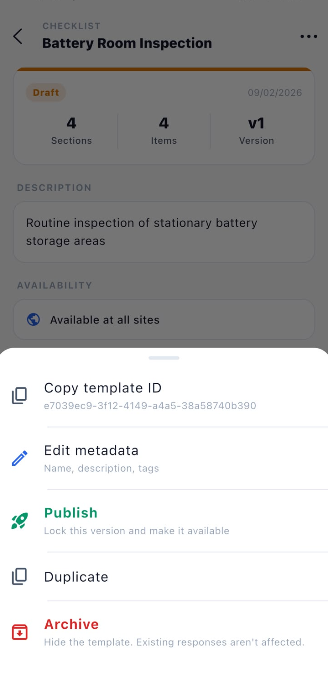
After creating a checklist, the checklist is saved in Draft status. Users can open the newly created checklist and use the three-dot menu (...) to manage the checklist.
2.1 Checklist Status
The checklist details page displays the current status and basic checklist information.
| Field / Information | Description |
|---|---|
| Draft | Indicates that the checklist has been created but has not yet been published. |
| Sections | Displays the number of sections available in the checklist. |
| Items | Displays the number of checklist items/questions configured. |
| Version | Displays the current checklist version. |
| Description | Displays the description provided when the checklist was created. |
| Availability | Displays where the checklist is available, such as Available at all sites. |
2.2 Checklist Actions
Click the three-dot menu (...) on the checklist details page to view the available actions.
| Action | Description |
|---|---|
| Copy template ID | Copies the unique ID of the checklist template. |
| Edit metadata | Allows the user to edit the checklist metadata, including the Name, Description, and Tags. |
| Publish | Publishes the checklist and makes the current version available for use. |
| Duplicate | Creates a copy of the existing checklist as a separate checklist. |
| Archive | Archives the checklist and hides the template. Existing checklist responses are not affected. |
2.3 Copy Template ID
The Copy template ID option allows users to copy the unique identifier of the checklist template.
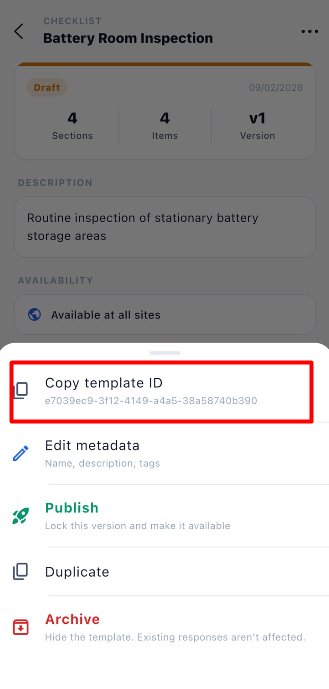
Steps
- Open the newly created checklist from the Draft list.
- Click the three-dot menu (...).
- Select Copy template ID.
- The checklist template ID is copied.
2.4 Edit Metadata
The Edit metadata option allows users to update the basic information of the checklist.
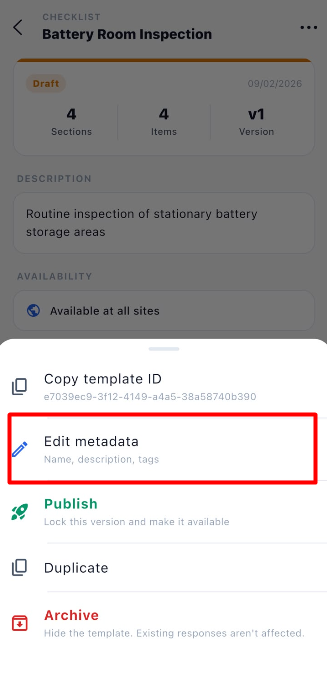
The editable metadata includes:
- Name
- Description
- Tags
Steps
- Open the checklist.
- Click the three-dot menu (...).
- Select Edit metadata.
- Update the required checklist information.
- Save the changes.
2.5 Publish Checklist
The Publish option changes the checklist from Draft status to Published status.
Publishing locks the current version and makes the checklist available for use.
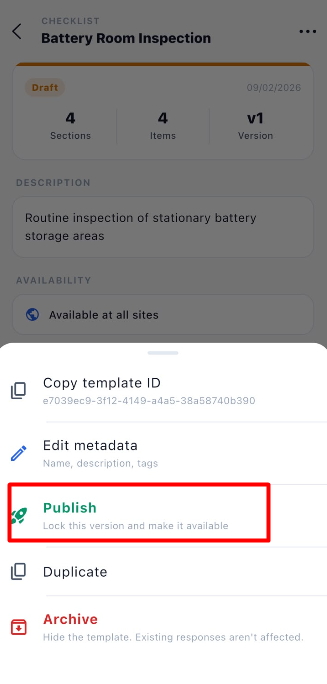
Steps
- Open the checklist from the Draft list.
- Click the three-dot menu (...).
- Select Publish.
- The checklist is published.
- The checklist status changes from Draft to Published.
- The published checklist can be made available for use according to its configured availability.
2.6 Duplicate Checklist
The Duplicate option allows users to create a copy of an existing checklist. The duplicated checklist can then be configured separately.
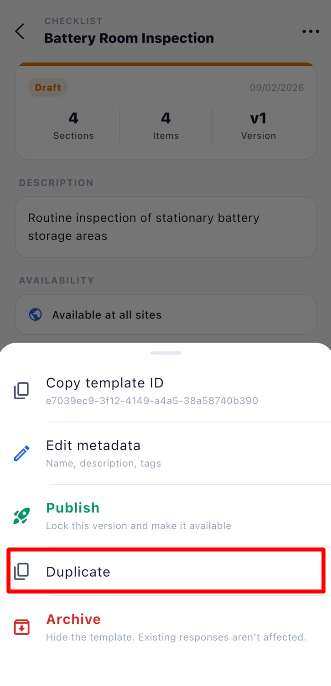
Steps
- Open the required checklist.
- Click the three-dot menu (...).
- Select Duplicate.
- A copy of the checklist is created.
- The duplicated checklist can be configured separately.
2.7 Archive Checklist
The Archive option allows users to hide a checklist template when it is no longer required.
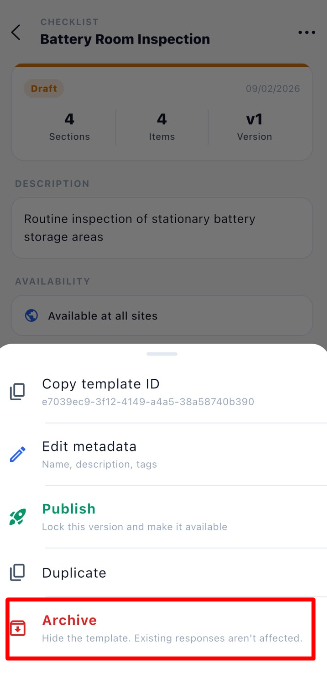
Note: Archiving the checklist does not affect existing checklist responses.
Steps
- Open the required checklist.
- Click the three-dot menu (...).
- Select Archive.
- The checklist template is archived and hidden from the active checklist templates.
2.6 Manage Checklist Status
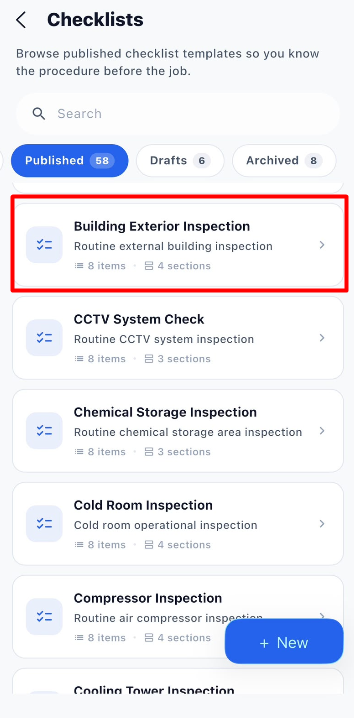
The Status option allows users to change the status of a checklist.
Steps
- Open the required checklist.
- Click the three-dot menu (...).
- Select Status.
- The checklist status changes from Draft to Published.
- The checklist is moved to the Published section.
- The published checklist can now be used according to its configured availability.